
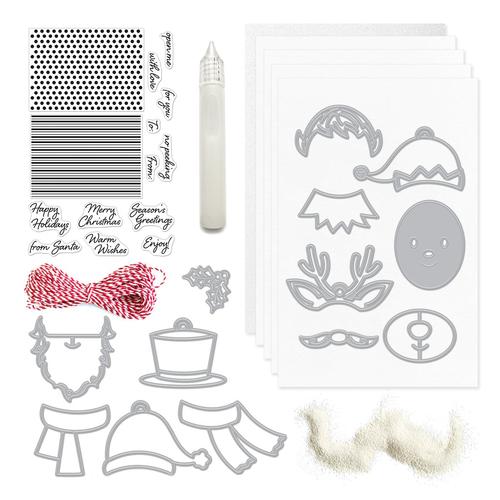
November is here and the holiday season is upon us! With our November My Monthly Hero kit, we have everything you need to create adorable handmade tags and/or gift toppers for all of your Christmas gift-giving. The dies in this kit are equally great for cards, scrapbook pages, and even felt ornaments! We've included a stamp set with patterns to decorate the tag pieces, and plenty of holiday-themed messages, too. To round out the kit, we've included cardstock and glitter paper for die cutting your characters. White Puff Embossing Powder is fun for adding some dimensional texture, and our Lacquer Pen adds extra shine. And last but not least, there's festive red & white twine for embellishing, or attaching your tags to gifts.
Thank you for using my affiliate link to shop, your support is greatly valued, and I shall endeavour to share as many inspirational posts as possible.
New Website Promo! There's still time to take advantage of this very generous promotion from Hero Arts to celebrate their new look website. There's no need to enter a code as you will receive an automatic $10 off discount when you spend $25 or more. You can shop here: www.heroarts.com
KIT INCLUDES:
• 4" x 6" Clear Stamp Set
• 13 Coordinating Fancy Dies
• 10 Sheets of Snow Cardstock (5.5" x 8.5")
• 1 Sheet of White Glitter Paper (5.5" x 8.5")
• White Puff Embossing Powder (0.5 oz.)
• Lacquer Pen (0.5 oz.)
• Holiday Twine (1 yard)
Your kit will arrive in a Hero Arts reusable 8" x 10" zipper pouch. With all of the goodies packed into this kit, it's an incredible value at $34.99. (Contents add up to $70 if bought separately.)
LIMITED TIME ONLY! Once this product sells out, it will no longer be available. Quantity is limited to two kits per household. Kit shipping begins Friday, November 5, and continues throughout the following week.
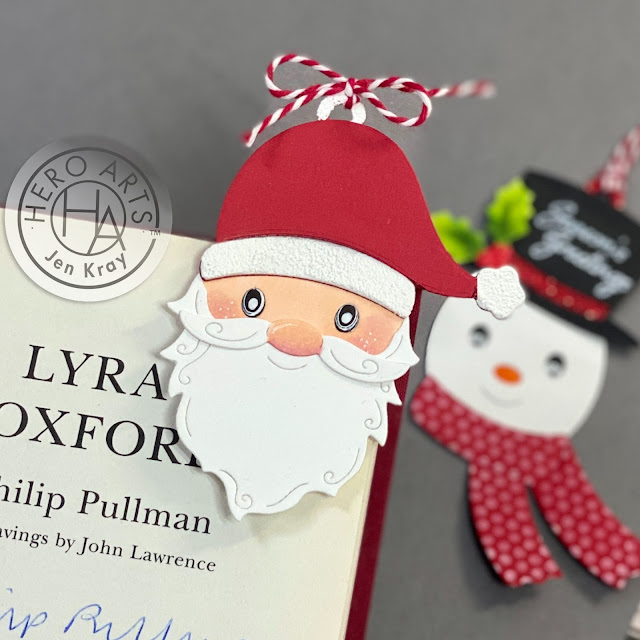
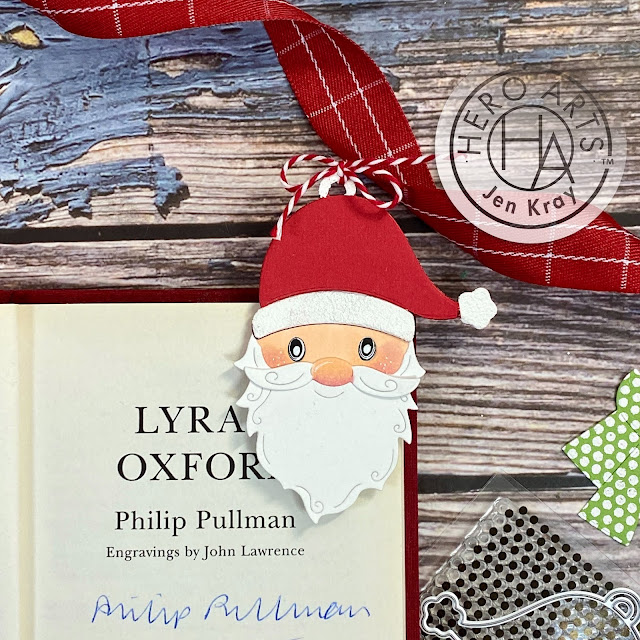
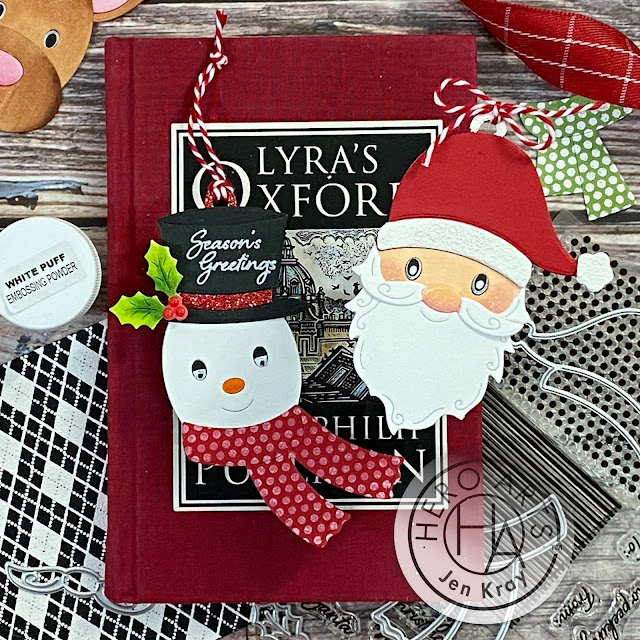
I'm kickstarting the month's projects with some really fun tags. I've made two but with a little twist. The Santa tag is actually an origami corner bookmark and the snowman is a paperclip bookmark.

Instructions
- Die cut the santa pieces: the face, beard, moustache, and hat in Dove White, die cut another hat in HA red.
- Color in the little eyes with a black alcohol marker, add accents with a white gel pen. Use Copics to color in the face and nose.
- Use puffy embossing powder on the rim, the loop, and ball of your hat. Trim and adhere to your red hat.
- Assemble your santa, and add a little twine to complete the look.
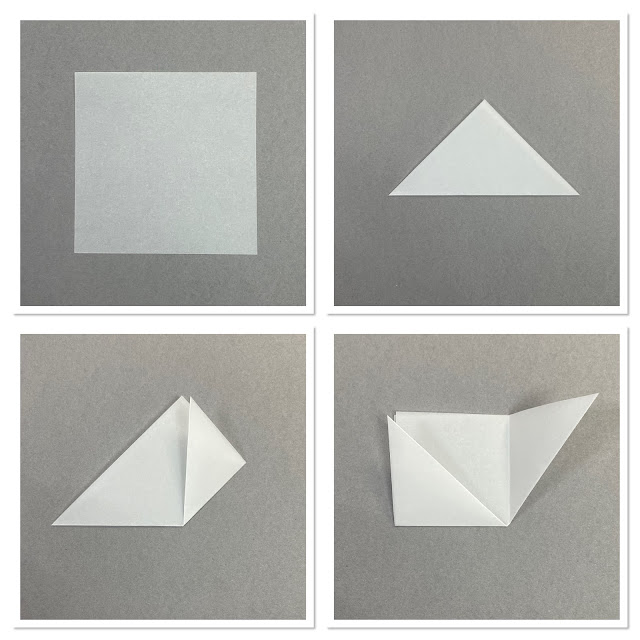
Origami Steps 1-4
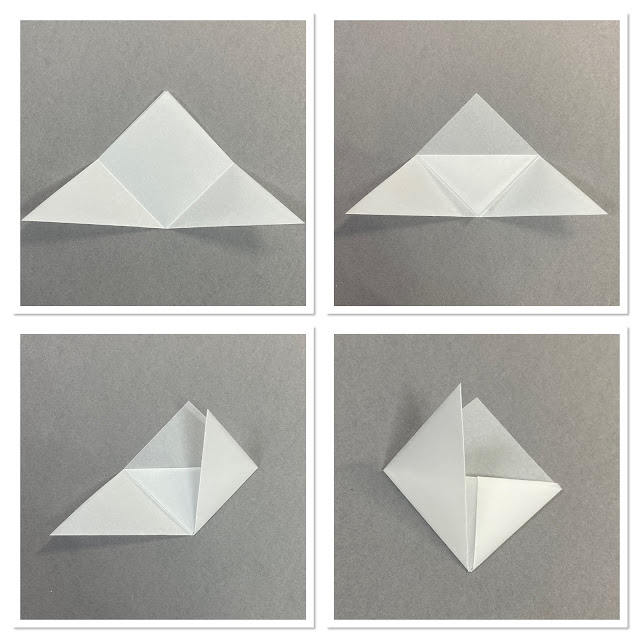
Origami Steps 5-8
Origami Steps 9-12

I absolutely love these little tags and felt they were perfect for bookmarks. I'm an avid reader and still have plenty of actual books in the house.
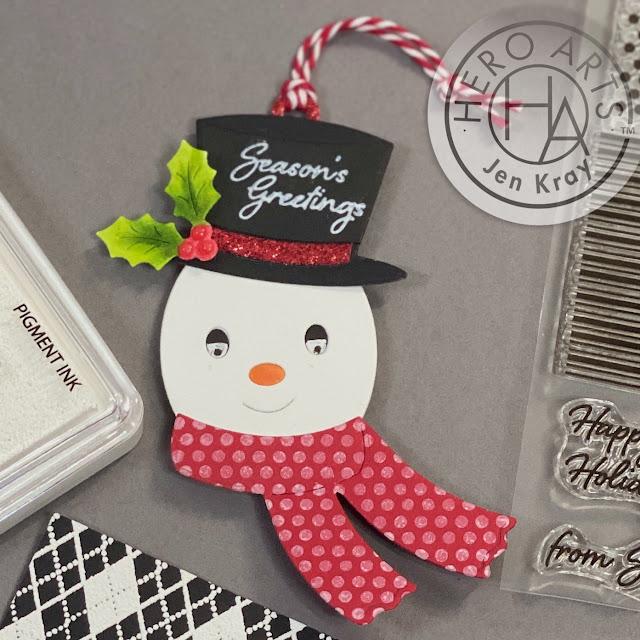
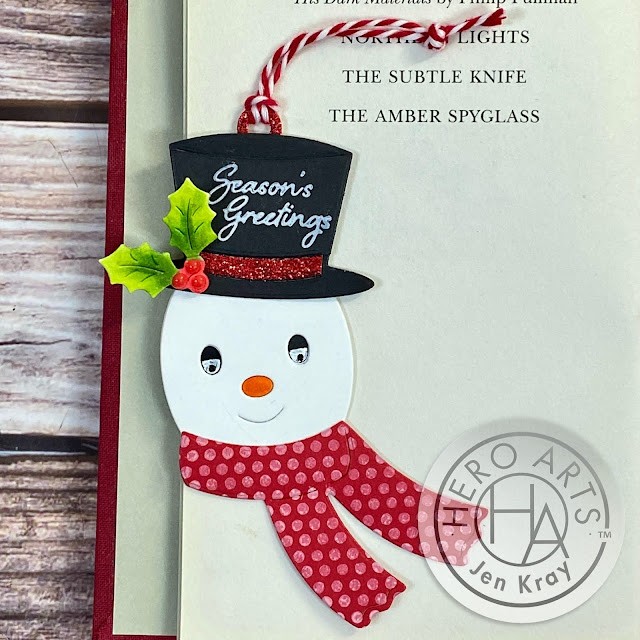
Project 2 - Altered Paperclip Snowman
I use a LOT of stationery, clips and paperclips for sure! So when I saw these gorgeous little characters I knew I wanted to use one on a paperclip. Now this is another easy make, perfect for us adults, children and anyone who still believes in the magic of Christmas.
Instructions
- Die cut your elements, top hat in black and glitter card, head and holly in Dove White, and scarf in HA Red.
- Stamp your polka dot design onto the scarf, and your sentiment on the hat with Unicorn White pigment Ink and allow to dry.
- Color in the little nose, eyes and holly with Copics. Add some Nuvo Drops as the berries.
- Assemble your glitter pieces onto your black top hat and add a little twine.
- Use a small paperclip to add directly to the back of your snowman with some hot glue.
There's so many ways to use these characters, and I've only shown 2. Also in the kit is a reindeer and an elf!
In the photo above you can see one of the add-on stamps, it's AMAZING!


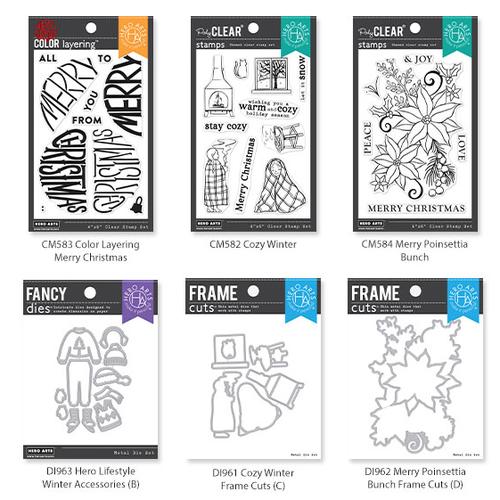
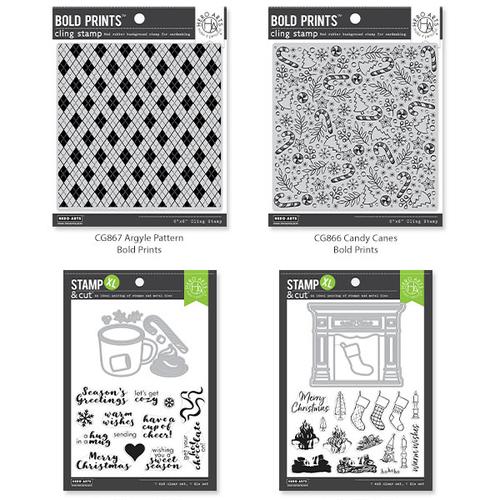
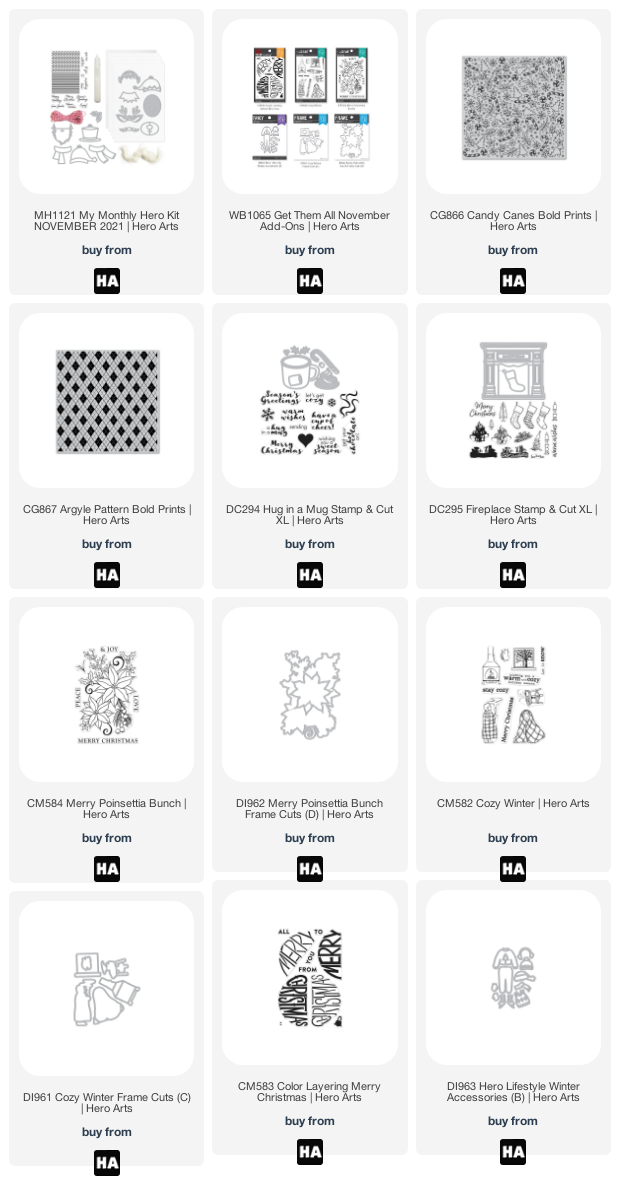
The MMH Add on's as follows: (the buy it all contains each of the following products at a great discount)
- CG866 Candy Canes Bold Prints
- CG867 Argyle Pattern Bold Prints
- CM582 Cozy Winter
- CM583 Color Layering Merry Christmas
- CM584 Merry Poinsettia Bunch
- DC294 Hug in a Mug Stamp & Cut XL
- DC295 Fireplace Stamp & Cut XL
- DI961 Cozy Winter Frame Cuts (C)
- DI962 Merry Poinsettia Bunch Frame Cuts (D)
- DI963 Hero Lifestyle Winter Accessories (B)*Recommended for use with DI841 Hero Lifestyle Forms Fancy Dies and CM500 Hero Lifestyle Faces, both sold separately.
Thank you for joining me with my very first post as part of the Hero Arts Global Team! I'll settle in and soon find my feet with the launches and working with all the wonderful HA team.
See you soon!
Jen (kittenmoose)
Jen (kittenmoose)
Shopping List
Thanks for the instructions for the origami bookmark. A friend recently gave me one using a different character. Your pictorial is very clear. Thanks again.
ReplyDeleteHi Talitha! Thank you for your lovely comment, it really made my day! I do try and give instructions as much as possible but if there's anything you're nit sure of in my posts just pop me a comment and I'll help. Have a great day.
DeleteVery very cute! I love the bookmark idea 😍😍😍
ReplyDeleteAnang, hi! Thanks for popping over to my blog. I do love a good book so anytime I can add little embellishments, I will!
DeleteGreat work Jen. A super little project idea! X
ReplyDeleteHi Mary! Thank you for your lovely comment, my friend! Sending lots of love. xx
DeleteCute projects. Thanks for the great instructions. I'm going to make these as soon as my kit arrives.
ReplyDelete